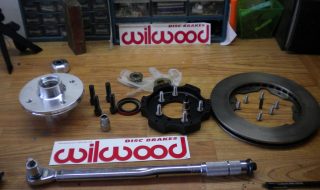
Installing Disc Brakes for my Falcon Wagon Cruiser If you've been to MyRideisMe.com much, you've seen my 1963 Ford Falcon Wagon Build. This might be one of the slowest builds in history, but hey, I'm doing it myself or with the help of friends and my pops. Not often enough, I escape from reality in the smell of grinding metal or the buzz of a MIG. Ahh... you with me? One project I've wanted to do for a long time is update the front brakes. Trouble is, the disc brake kits for 4-lug cars are usually made from put-together kits with brake parts from a few different cars. For your brakes? OK, well maybe... we've all probably done less-safe things... but I wanted the best for a key safety feature like my brakes. So I got the Wilwood disc brake kit for 4 lug Fords. This kit works perfectly for 4-lug Mustangs as well as Falcons. If you prefer a video, skip to the bottom of this story and check it out. This is one side of the kit shown below. One of the best parts? Everything...

Video: Metal Flake with a 40-buck Paint Gun
posted by pikesan
Cheap Paint Guns Still Shoot Metal Flake When I posted my metal flake FAIL I heard from my new friend Chris at Chaotic Customs. He made a great how-to story about creating a custom metal flake roof for your ride. (Picture from my vast photo archive, I have no idea what paint gun was used here or who's ride this is...) Great Chris, but I don't have a $300 paint gun, and guess what, as often as I use one, I doubt I'll spend the money on one since we all have so many toys we want. (plus, as my friends would attest, I'm a tight-ass!) Challenge accepted! (and then some) Chris came through with a how-to video for shooting metal flake and he used a cheap Harbor Freight gun! I hope we can all afford $30-40 for a gun and if you watch, Harbor Freight has 20% coupons available almost all the time. Chris also shows a few more details about setting up the gun and what he literally throws away when using the HF gun. It's a fun video with great commentary... Thanks a million...

10-second Check to Avoid 3 Common Valve-lock Troubles in Racing Engines
posted by Moore Good Ink
Valve-Lock Inspection to Save your Engine By Fergus Ogilvy Photos by Moore Good Ink This advice may only help hard core race engine builders, but any time we have a chance to publish high quality tech like this info from Trend Performance, we'll do it. Wish I would have saw this before putting the valves back into my Falcon! (course that's anything but a racing engine!) Enjoy! Assemble the valve locks on a valve and using your thumb and forefinger raise the spring retainer to its full height. If the assembly defies gravity and remains in place and doesn't rock, the quality of the valve locking assembly is superior. If, however, the assembly falls apart, the valve locking mechanism is deficient in one or more of its dimensions. The three critical dimensions of the valve lock 1. The outside angle: The precision of the outside angle, which might be 7, 8, 9, or even 10 degrees, is properly measured on a sine vice. For ease of valve lock removal, high revving racing engines often use locks with the greater angle. The greater the angle, however, the more...

How-to: Keyless Ignition Kit for your Custom Car
posted by pikesan
No Keys Needed - Modern Ride Convenience for your Hot Rod Story and Install by Rob Zoller AKA: Mr. Freeze Ok it’s got power steering , power brakes , ice cold AC, power windows, deck-less sound system, a GPS speedometer and an electronic shifter so I figured when Pikesan asked me to put another electronic gadget into my seemingly “Rat Truck” (on the outside) I figured, why not! I've been test driving new cars lately and it seems like all of them have keyless ignition. To seal the deal, I rented a car for a week that had keyless ignition. It's funny, but when I got home and drove my own car, I started thinking... what a pain to pull your keys out of your pocket! So problem solved on my COE. Think this bad boy deserves a keyless igntion kit? Upon my new Flaming River keyless ignition arriving I noticed that this was gonna take some time to install and once again there were a lot of new wires and another control box to contend with, but once I got into it I was pleasantly...
1956 Chevy Belair Painless Wiring Install How-To
posted by GreaseGirl
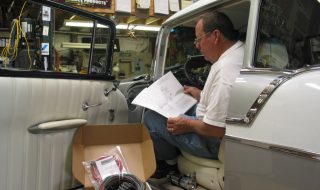
By Dennis Overholser Get the step-by-step as Jim Whittenburg of Custom Auto Wiring installs Painless Performance Product's 18-circuit universal wiring kit (#10202) into Roc Strickland's 1956 Belair. Page 1: Getting Started Removing old wiring Page 2: Layout the new wiring harness Start routing wires Mounting the fuse block Ignition Switch wiring Page 3: Light switch wiring Turn signal wiring Dakota Digital Dash wiring Tail lights wiring Page 4: Head and turn signal wiring Engine compartment wiring Final Test Jim sits in the 56 and refreshes himself on the installation instructions furnished in the Painless wiring kit. Even though he has installed several over the years, he always checks for improvements added to the manual. When doing any type of wiring repair or installation the first thing to do is disconnect the battery for safety. Jim has a plan and he likes to remove any accessory that might be in the way when routing the wires. Here he removing the air cleaner for better engine access. For better access to the under dash, the seat and fire extinguisher will be removed. John Roberts came by just in time to help...
Custom Dash for a 1967 Plymouth Barracuda
posted by pikesan
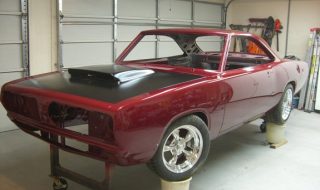
How to Build a Custom Dash for a Barracuda My buddy Scott Hallner's a hard working man! He found a 1967 Barracuda that I think alot of people would have passed on. It had what's known as some, "rust issues". OK, the car was rusty BAD! Check this out: Scott did a pretty amazing job replacing body panels and a host of other body work & paint, then he got to work on updating nearly everything in the car to install a pretty nasty Dodge small block. See all of his work in his MyRideisMe.com Garage. Along the way, he turned his attention to dash. He'd already installed a Vintage Air system, so to finish it off, he made a completely custom dash. Here's the finished product, then you can see how he did it below. Making a Custom Dash and Gauge Cluster 1) The plastic cluster and trim were trashed so I started w/sheetmetal. A local HVAC shop bent my piece for free. A piece of cardboard was used to mock up the layout. 2) Making the gauge pods: Scott used exhaust scraps that were 3.5 and 3" in diameter. 3.5"...
The SpinTron – The Racer’s Edge in Valve Train Development
posted by pikesan
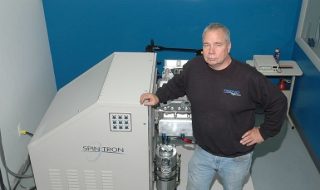
SpinTron Roller Tappets, Rockers and Friction Testing From our friends at Goodink and Jesel, here's your chance for an inside look into the highest performance race engine component development and the special equipment needed to break records at Bonneville or in the NHRA. In this case, it's a dyno, it's got a laser... it's SpinTron! - pikesan Story by: Ray T. Bohacz Jesel, one of the best competition valve train specialists to emerge in the past thirty years, owes much of its supremacy to extensive developing and testing of its competition parts. The test machine is a SpinTron. The parts being tested are principally roller tappets and rocker arms. “Ten or twelve years ago when I first pressed the SpinTron into action,” says Danny Jesel, “my immediate response was one of shock—the racket it generated was incredible! I just wasn’t expecting the opening and closing of two valves to be so loud, and initially I thought something was broken.” Once Danny Jesel became accustomed to the commotion, his next challenge was grappling with the phenomenon known as "lofting". Lofting occurs when engine speeds increase, usually above 4,000rpm, causing the...

21 Posing Tips for Aspring Pinup Models and Photographers
posted by pikesan
Better Pinup Poses for Great Pictures Photo courtesy of Digital-Photography-School.com I'm always trying to take better pictures. Whether it's custom car or family portraits or a beautiful pinup model, we're all trying to do our best work. To keep learning, I receive newsletters from a few great websites. One of them is Digital Photography School. I found this post called: Posing Guide: 21 Sample Poses to Get You Started with Photographing Female Subjects I figured this would help out models and photographers alike, even though it's not focused on pinup photography. Take a look and see what you think: Read more: http://digital-photography-school.com/21-sample-poses-photographing-female-models#ixzz23gQS36df Sign up for their newsletter and learn a little every...
5 Things to Know About Performance Pushrods
posted by pikesan
Trend Pushrods - New Ways to Combat Pushrod Troubles Seeking and finding stories about great engine builders and the high performance parts they use, every once in a while, you find yourself asking. "What makes xyz so special?" In this case, I got to talking about high performance pushrods and didn't know much about them. Luckily, Trend Performance makes pushrods for everybody from the weekend warrior to the best of NHRA and NASCAR. So I asked a few questions... An interview with Bob Fox, founder of Trend Performance By Sam Logan with photos by Moore Good Ink Today the Michigan firm Trend Performance is the largest manufacturer and supplier of pushrods in racing and the performance aftermarket. But in 1988 when Bob Fox founded his pushrod company, after working the phones as a tech rep at Diamond Racing, things were different. During his time at the piston company, he noticed that the performance of competition pushrods was little better than adequate—their lengths varied and their ends failed—both ends! Manufacturers would reduce the material thickness of the cup ends in order to form them, and as a result they would...

Engine Doctor Prescribes More Flow for Your Smallblock Ford
posted by pikesan
Cylinder Head Innovations for 302w Heads & 351w Heads I made an appointment with the Engine Doctor, Jon Kaase. The good doctor told me about a new set of 302w or 351w heads that are ahead of their time like morphine to a cheap bottle of whiskey. Before we trust any doctor, it's best to look'm up and see where they come from. Kaase, as fate would have it, is the self-described "black sheep" in a family full of actual medical professionals... Kaase, on the other hand, "...liked mechanical things from the time I was little, and I never gave it up." Sound like anyone you know? With references checking out fine, let's learn about the new P-38 canted-valve Windsor cylinder heads. (Text and images provided by Moore Good Ink) Small Block Ford Aluminum Heads with Better Cylinder Filling Jon Kaase keeps his eyes peeled. Over the years, the engine builder has seen an endless string of improvements and aftermarket components visited upon the 302 Windsor heads but he was woefully aware that there were no real advancements beyond the original cylinder head configuration. He thought he could produce...
12 Steps to Cam Replacement and Break-in
posted by pikesan
Camshaft Assembly Lube & Break in Lube Part of my 1963 Ford Falcon engine build is researching how to build and break-in the engine... the right way. To get great advice, I asked the experts at Edelbrock. They've been building engines and hot rod parts forever... not to mention they've been very cool helping me with my engine build and with MyRideisMe.com. Hope these tips are helpful! Tech with Edelbrock: Camshaft Break-in for Hydraulic Flat Tappet Camshafts Upgrading your hydraulic, flat tappet cam is a very popular performance upgrade. In many cases, cam changes happen independently of a complete engine rebuild. With or without engine rebuild, when changing cams, proper steps must be taken to ensure a hassle-free installation, break-in period, and of course, good cam and lifter life. The following are the basic steps for camshaft break-in. Read and follow the included instructions with every Edelbrock cam and lifter kit. We're skipping the assembly and disassembly steps because there's too many variations to cover it all. 1) Always use new lifters with a new camshaft. Do not use existing lifters with a new camshaft. Cam lobe wear is...
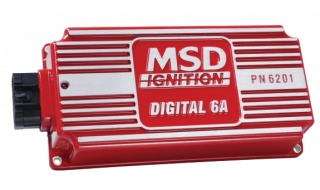
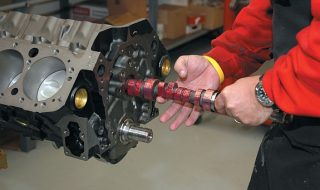
Points are Cool – MSD 6A with Points Benefits
posted by pikesan
Points Conversion for Distributor or Stick with Points and an MSD Box Sometimes simple is best. Or sometimes... we're low on cash! So when it comes time to upgrade or convert your points distributor to electronic type, maybe you can wait on the distributor mod, pickup the MSD box and still get all the benefits of an MSD box. Sound good? Read on... For those of you who simply can’t find an aftermarket distributor or the conversion parts needed for you nostalgic distributor to upgrade from points, the MSD box will work well for you too. When you install an MSD to your points distributor, you’ll still receive the powerful, multiple sparks that MSD is known for along with the performance that comes from it! Specifically, with an MSD installed: The points will last much longer Adjusting or "gapping" the points isn't crucial to performance You'll rock MSD’s multiple sparks and Capacitive Discharge (CD) power The points will last much longer It is true, that a magnetic pickup distributor is much more accurate than a points distributor, especially when it is complemented with an adjustable advance, sealed bearings and...