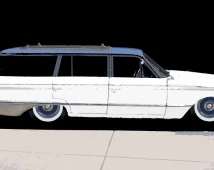


We worked on the beast for 12 hours, and it almost looks exactly the same as it did before I started! (at lease to the neighbors!)
Certain tasks sure seem to go slowly. When I look back at the pics though, I can see why it took so long. Here is a small recap... (for a full-size recap, click on the picture link below)
Due to our needing to move the cross member 4 inches rearward, (because the overdrive trans was longer), we had to make new side plates. Construction paper makes the perfect template.

The next step was to bolt everything "in place" and tack the plates to the dual frame rails, and also to the crossmember itself.

Next, we had to cut the tacks that hold the plates to the frame rails, but leave the plates tacked to the cross member. we drilled small holes through the plates just to get me in the ballpark of where the holes in the crossmember are located. This is the part where we had to go in with a die grinder and enlarge all the holes, and line everything up perfectly with the holes in the crossmember. Then, we had to bevel all of the notches in the plates where it will weld to the frame rails. This makes the welds much stronger. we also had to patch any cuts that we put into the plates from hitting it with the cutting wheel, while removing it from the car. I also pulled a bonehead, and didn't account for the amount that the transmission mount will compress (which is about an inch) and drilled one of the holes too low. We had to fill this in. Can you see why it took 12 hours?
before (with patch in place)

after:

Next, was to bolt the finished beveled cleaned plates to the crossmember, put it under the car, and final weld the plates to the dual frame rails. Almost there... or so I thought. I discovered another bonehead. The crossmember is slightly wider at the top than it is at the bottom. ????
When I welded on the top eyes, the heat shrank the material and pulled the tabs out-wards. I couldn't get the darn thing out. After torching, bending, prying and pulling, I got it out, then had to grind it quite a bit to level it back out. (about two hours worth). This was not my favorite part of the project...
The final step is to box the frame mounts 

The finished mount: (and don't forget to primer all of the metal inside the box before you weld it up, and allow a place downhill, preferably, where the water can drain,should any make its way in there...and it will)

I finished up the other side, primered everything and installed the transmission and cross member into the car. DONE
http://share.shutterfly.com/action/welcome?sid=9AbN2rJq3as4m
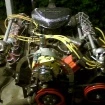
Now that the motor and the transmission are in and properly mounted, I could finally move on to another section of the car :-)
YAY!