RoadLeveler
| Location: | Mesa, AZ, USA |
| Joined: | 10/03/2007 |
My Styles
Tuner, Euro, Low Rider, Build-It, Drive-It, Builder
views: 67368
My Crew 5

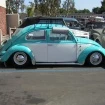
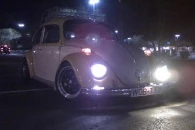
"Betty" 1972 Volkswagon Beetle
Introduction / Overview:
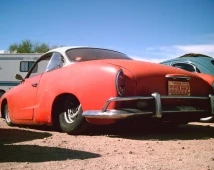
Well I loved this car but i had to sell it to buy a Karmann Ghia and pay for a move. Bummer, but the Ghia turned out totally awesome so its all good.
Drivetrain: Self built 1600dp motor, German AS41 case, SCAT cast CW crank, SCAT forged I-beams, Mahle forged pistons, 12.5 lbs lightened VW flywheel (8 dowel drilled), German bearings. Stock IRS 4spd trans. Stock shifter with 2 EMPI quick shift plates stacked. BugPack header, sideways EMPI stinger with welded baffle.
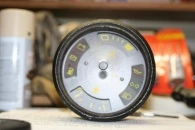
Chassis: Dropped 3 big splines in the rear with EMPI 4x130 wide offset disc brakes, 2" down on the adjustable beam and 2.5" dropped spindles up front with EMPI 4x130 disc brakes. All electrical except dome light door switch works correctly. H4 conversion headlights soon to be 3000k HID, LED tail bulbs, big ass 50's era "stop" lamp, BLC 50's era 5.75" yellow fog lamp with Bosch HID custom fit in original 6 volt lens.
Wheels and Tires:
Rocket 8 spokes with 165 45 15's up front and 195 60 15's in back.
Body & Paint: Correct but not original hood. '68 tail lights. 1975 Honda Caroline Yellow primary, 1989 GMC Medium Flax sides. Front bumper lowered 2 inches, black trim removed from both. EMPI repop classic style roofrack.
Interioir: Front seats are original '72 bottoms with custom fit '65 low backs. All upholstery, including headliner was replaced by the previous owner. Classic GT style steering wheel. Early Porsche 944 turbo gauges. 7 inch 80's era dash fan provides the A/C. Dash pad removed in favor of original Clementine Yellow paint. Custom stereo with 4 speakers.
Lifestyles:
Build-It, Drive-It, Euro, Tuner