5 Steps for painting Vintage Hot Rod Door Art by Andy’s Pinstriping
Andy from Andy’s Pinstriping gives us 5 Steps for painting Vintage Door Art on Shop Trucks
1. The first thing I like to do is use some wax and grease remover and clean the panel to be painted. This simple step is honestly one of the most critical and most often overlooked steps in any paint project.
.
.
.
.
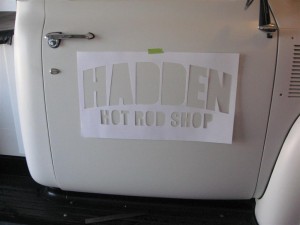
2. I like to make a stencil to help draw out the design. There are several methods I use to achieve the stenciled on pattern. One of the easiest ways is to use a pounce wheel & chalk, but on this particular truck I had no colored chalk, and obviously white wouldn’t do, so I went old school on it and cut the pattern out of poster board with an exact-o knife….five blades and several blisters later ta-da, a handmade stencil.
.
.
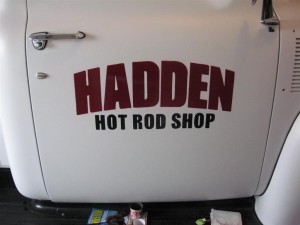
3. Finally to the fun part, let’s thrown on some paint! I start by tracing the pattern (after centering it on the door) with a stabilo pencil. After that it’s pretty self explanatory…just fill in the spaces with the one shot color of choice.
.
.
.
.
4. The almost finished product. When painting large areas its extremely critical to take your time! Make your brush strokes even (so the paint will flow out smooth) & don’t get the paint too thick…it has a tendency to crinkle up when its too thick. Its better to put on two or three thin coats to achieve full coverage. If you notice in the pictures there is a color difference between the passenger and driver side. This is because the passenger side three coats of paint and the driver side only has one.
.
.
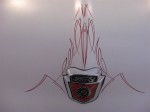
5. Finish work often involves the tedious stuff to include; any cleanup work to make sure your lines are clean & tight, outlining things or in the case of Ryan Hadden’s Truck ‘Plain Lorraine’, some pinstripe work on the hood.
.
.
.
.
.
As for any tips I can think of that would help out, the first one would be to not soley rely on stencils. They are great to speed up the process but be sure to use plenty of freehand work as well. You want your art to look good and appeal to the eye. What you don’t want is to have it look so uniform that it looks like vinyl stickers. Hand painted is always worth more and in most cases is much more respected than cookie cutter stickers.That’s not to say that vinyl doesn’t have it’s place; it’s great for many things, but if you are trying to build a period correct hot rod, it has no place there.
And last but not least…practice, practice, practice. It’s the only way to get better.
Thanks for reading this little tutorial & if you have any questions don’t be afraid to ask.
Andy
Thanks to Andy for providing this “how-to” article. To see more of Andy’s work, check out his blog “Andy’s Pinstriping”


Hello, what happens when you make a little mistake and you have wipe a letter off or clean up a little bit without ruining the paint underneath?