How-To: Ford Falcon 4-Lug Disc Brake Install
Installing Disc Brakes for my Falcon Wagon Cruiser
If you’ve been to MyRideisMe.com much, you’ve seen my 1963 Ford Falcon Wagon Build. This might be one of the slowest builds in history, but hey, I’m doing it myself or with the help of friends and my pops. Not often enough, I escape from reality in the smell of grinding metal or the buzz of a MIG. Ahh… you with me?
One project I’ve wanted to do for a long time is update the front brakes. Trouble is, the disc brake kits for 4-lug cars are usually made from put-together kits with brake parts from a few different cars. For your brakes? OK, well maybe… we’ve all probably done less-safe things… but I wanted the best for a key safety feature like my brakes. So I got the Wilwood disc brake kit for 4 lug Fords. This kit works perfectly for 4-lug Mustangs as well as Falcons.
If you prefer a video, skip to the bottom of this story and check it out.
This is one side of the kit shown below. One of the best parts? Everything is CLEAN, brand NEW and fits together perfectly. It came with complete instructions on how to put it together with only a few details missing that I’ll cover in video here. I got my brakes together with only minor head scratching, so they can’t be too bad!
I also liked how lightweight the kit was. No worries ripping 12″ wheel stands in my wagon after dropping 5 lbs changing from my drum brake setup. Low 16 quarter mile rips, here I come!!
As a brief word of caution, read the warning supplied by Wilwood. If you’re not confident in doing this job, ask a friend or pay someone. Then, when it’s all done, make sure to do a careful test drive following the instructions.
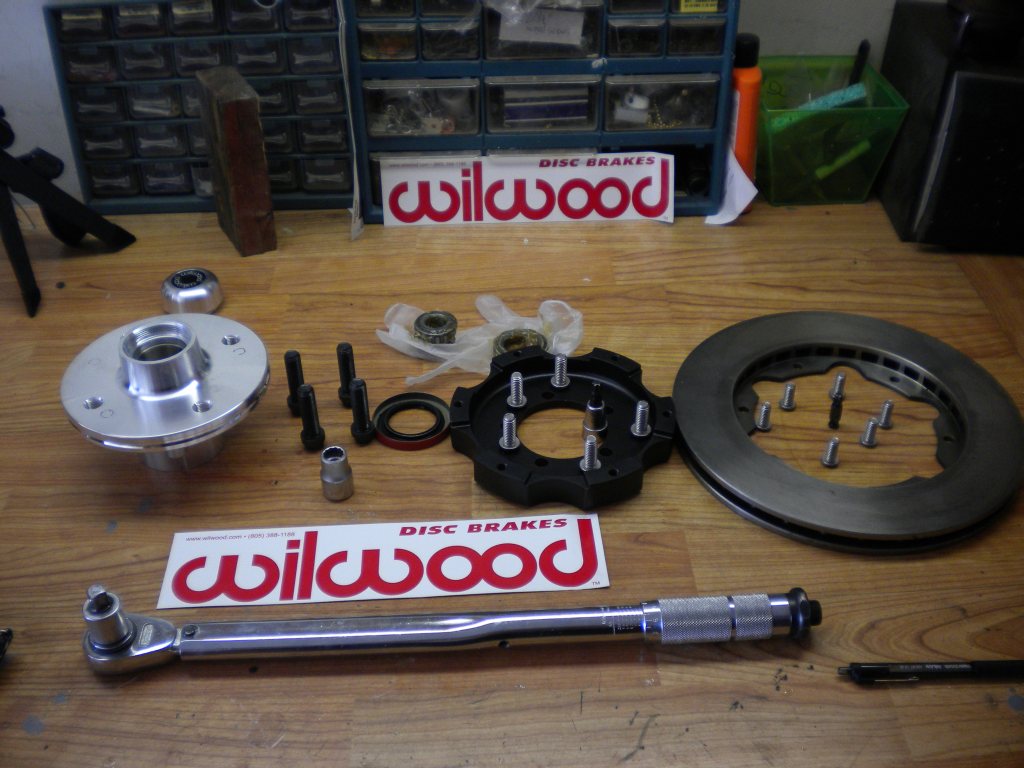
Step 1: Hub & Hat to Rotor Assembly
Here’s a list of the tools you’ll need to get started:
- 1/2 inch 12 point socket
- Torque wrench
- Impact driver (if you have one)
- Old 4-lug wheel (if you have one… I really needed it!)
- Wheel bearing grease
- T-45 Torx bit
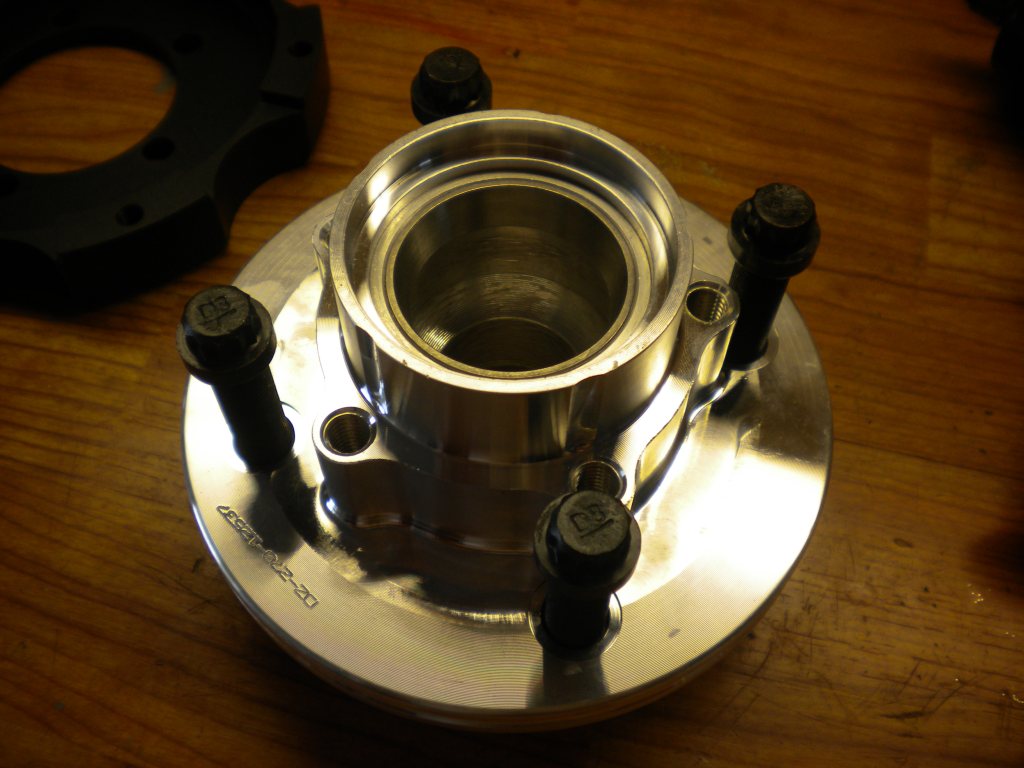
Start by installing the inner bearing. Grease it up then install the bearing seal. Get it started straight, then press it in. If you don’t have a press, tap the seal in with a hammer, carefully, then get it flush with a block of wood. Another testament to quality, the parts fit great… no problem.
Next, it’s easy to put in the wheel studs. I ran them snug using an impact wrench. I’ll torque them down to 77 ft-lbs. Don’t be surprised if the socket fits tight on some of the studs. Take your time… No problem so far, but how to hold this thing??!!
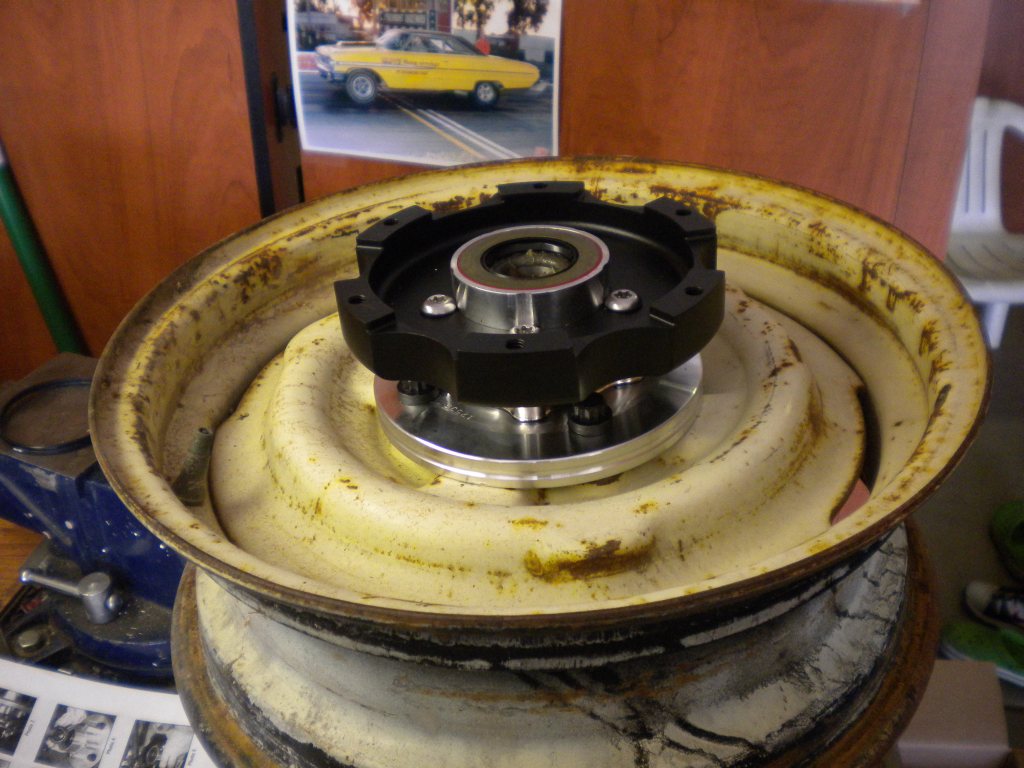
To torque down the studs and the hub hat, I used this old 4 lug wheel. In the picture, the wheel studs are installed and I’m torqing down the hat. The 5 x 3/8-16 Torx bolts need a T-45 Torx bit. Do yourself a favor and don’t buy the crap “Brake Torx Kit” from Harbor Freight. At way below 55 ft-lbs, the bit twisted. POS!! I had to run to Pop’s house to get a decent set. Torx bits are on my swap meet list for next time! Quality this time…
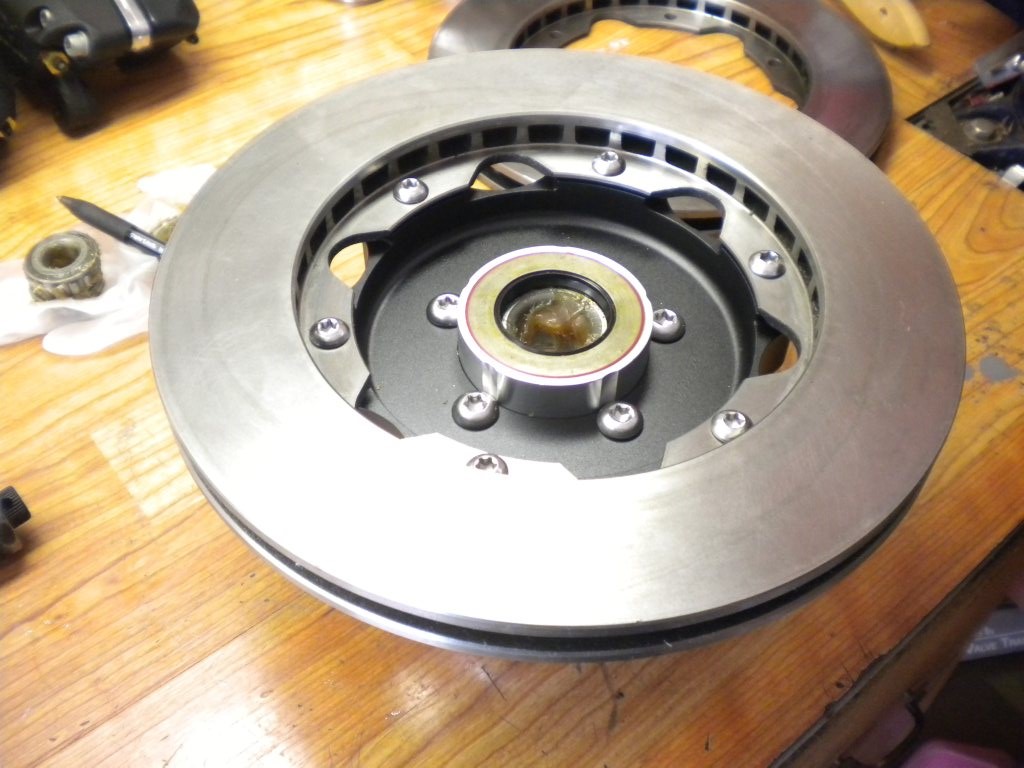
Finally, align the rotor to the hub hat as shown and assemble the 6 qty. 5/16-18 Torx button head bolts torqued to 25 ft-lbs.
Step 2: Caliper Mounting Bracket
Here’s a list of the tools you’ll need:
- Medium abrasive disc (or sand paper or whatever’s needed to get the surface clean)
- Torx T-55 bit
- 5/16 allen head wrench or socket
- small ruler and flashlight is helpful
Clean up the surface where the bracket will go to make sure the bracket sits flush. Paint’s not a big deal, but if there’s any casting flast or other burrs, those gotta go.
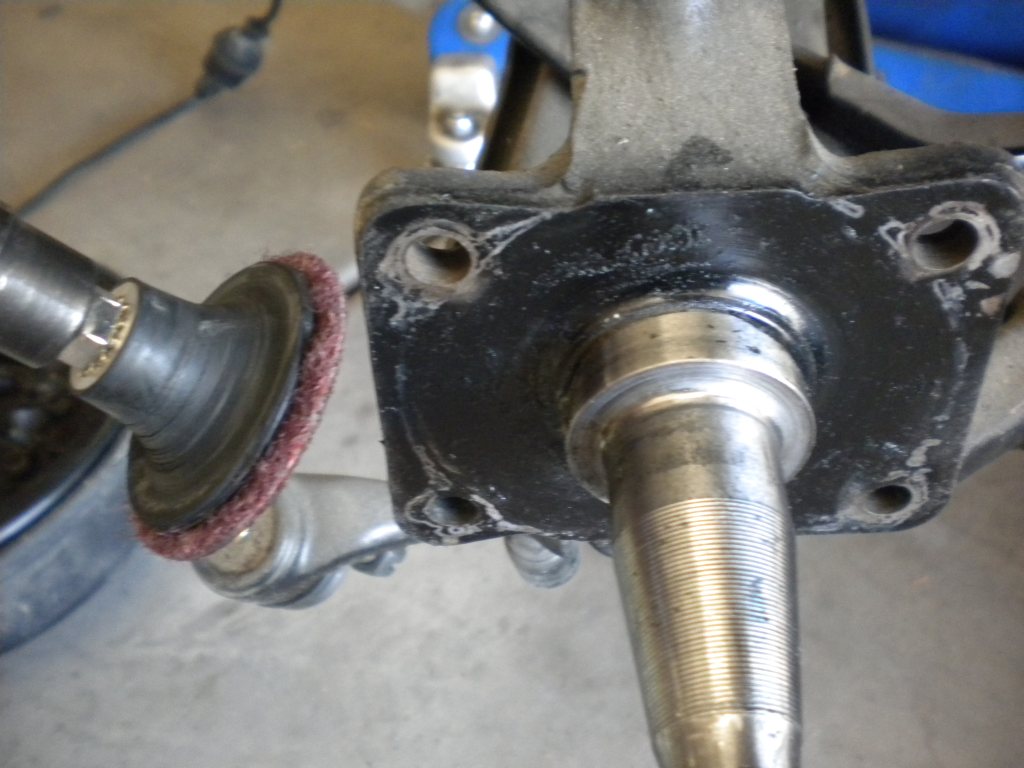
The next step is one of the slightly tricky ones. This is actually the very first thing you’re asked to do in the assembly instructions. I followed that order when I did it, but would do it this way next time.
The mounting bracket goes on the back side of the spindle. Pre-arrange the fasteners like this. 3/8-24 x1.75 socket head cap screws, then washer, spacer and shim. Put the bracket on and snug down.
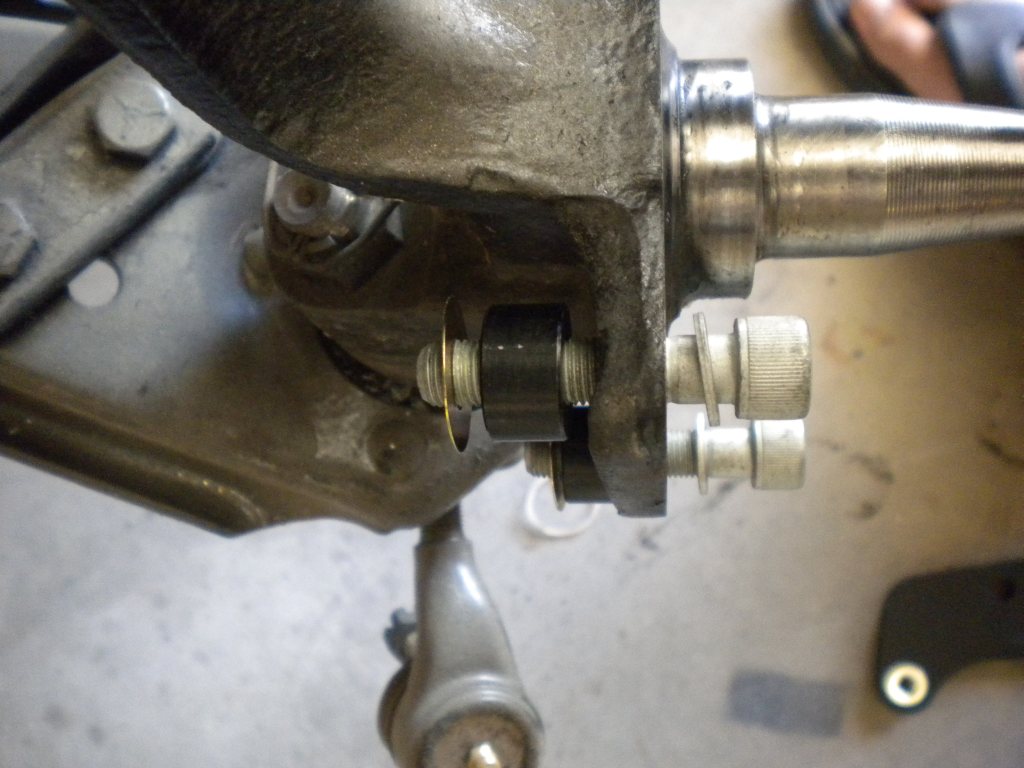
You should be here:
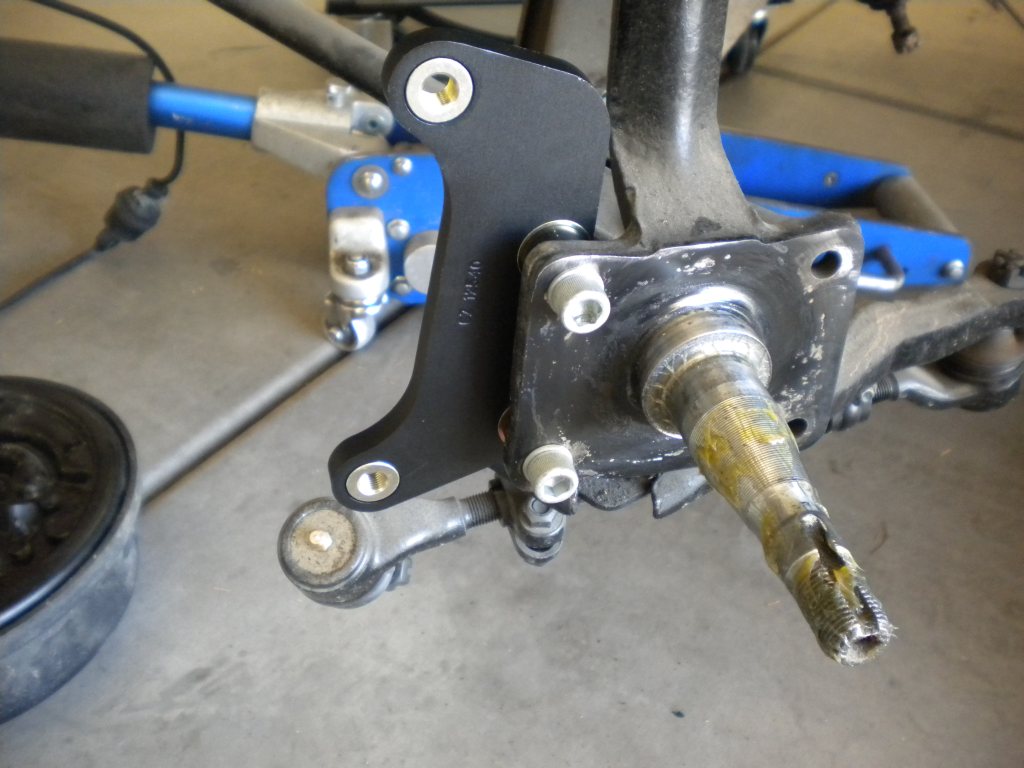
Next, you have to check that the mount is square, or parallel to the rotor. Put the rotor on and measure like I did in this picture or see the video for more info. Make adjustments using the thinner, 0.016″ shims supplied. When everything’s square, torque down to 30 ft-lbs.
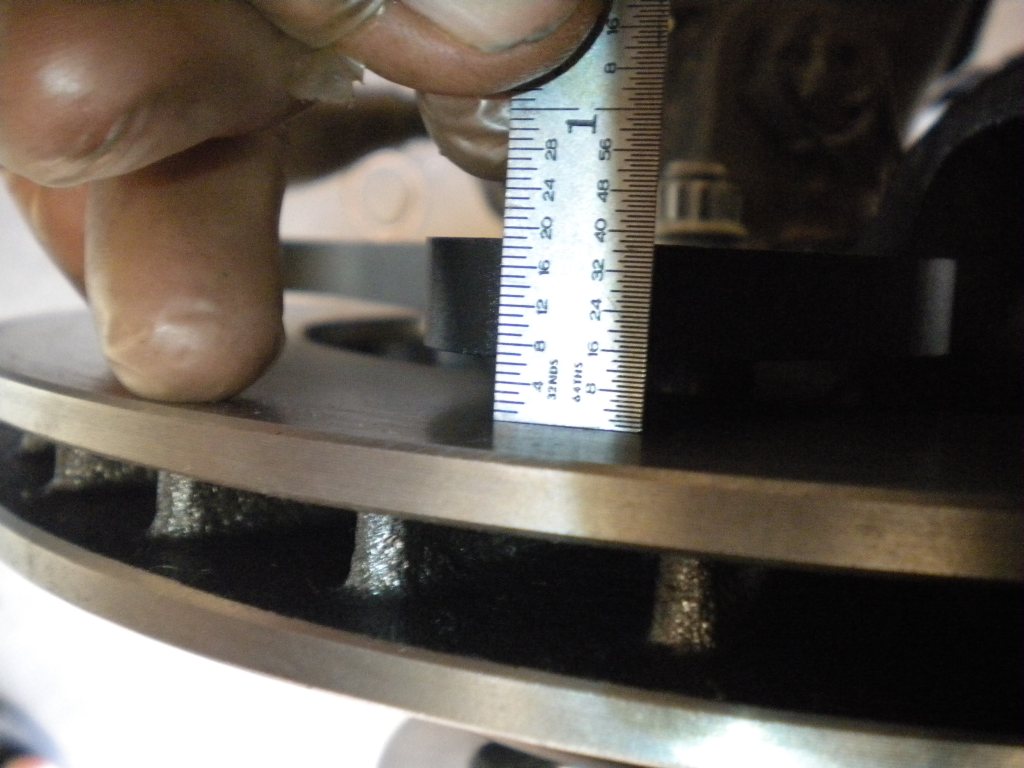
Step 2 1/4: Brake Fluid Fitting
Here’s a list of the tools you’ll need:
- 1/2″ wrench and teflon tape.
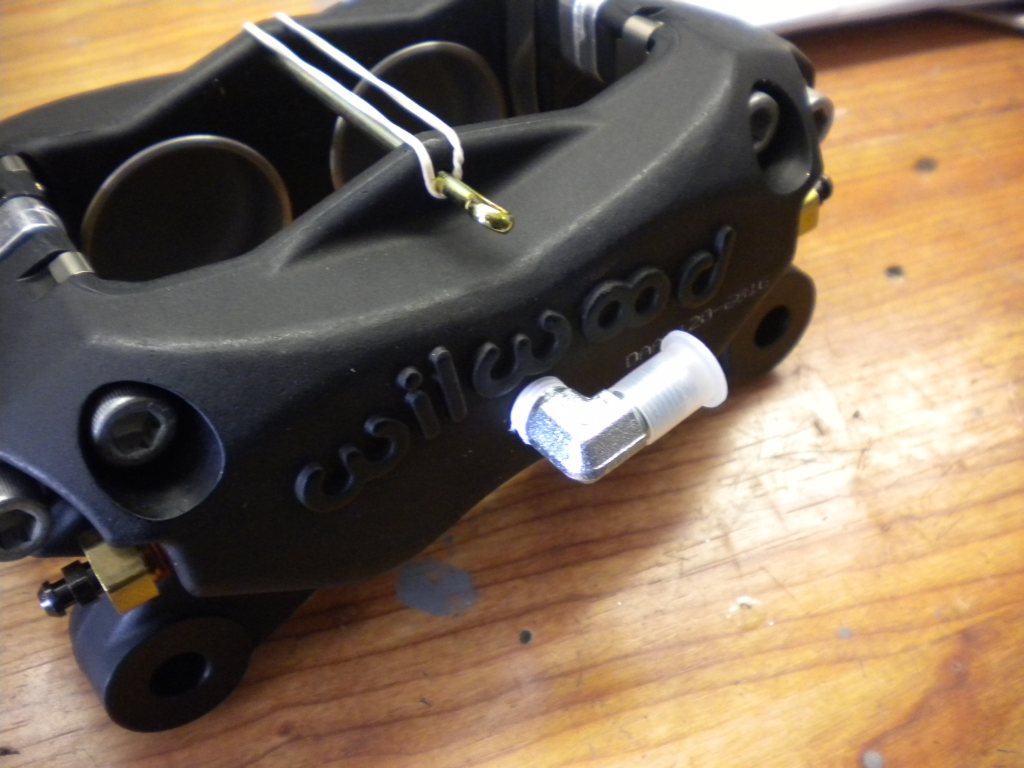
Assemble like this. I wanted to show the picture since the final orientation of the fitting wasn’t shown in the instructions. This will point the brake hose back towards the mount for the hard brake line.
Step 3: Caliper to Mounting Bracket
Here’s a list of the tools you’ll need:
- 9/16 socket and the torque wrench
- ruler
This is the way the instructions tell you to assemble the 0.035″ shim – between the caliper and the caliper mounting bracket. Directions suggest starting with 2 shims on top and on bottom. You should use the same number of shims on top and bottom in all cases. For me, I used ZERO shims for a perfect fit. In the video, you’ll see how I actually put the shim under the washer to make sure the bolt doesn’t stick out too far towards the rotor. The instructions are very specific about that. Even without the shim, I think I would have been fine, but with the shim, it seemed just right. See the video for details on how I measured.
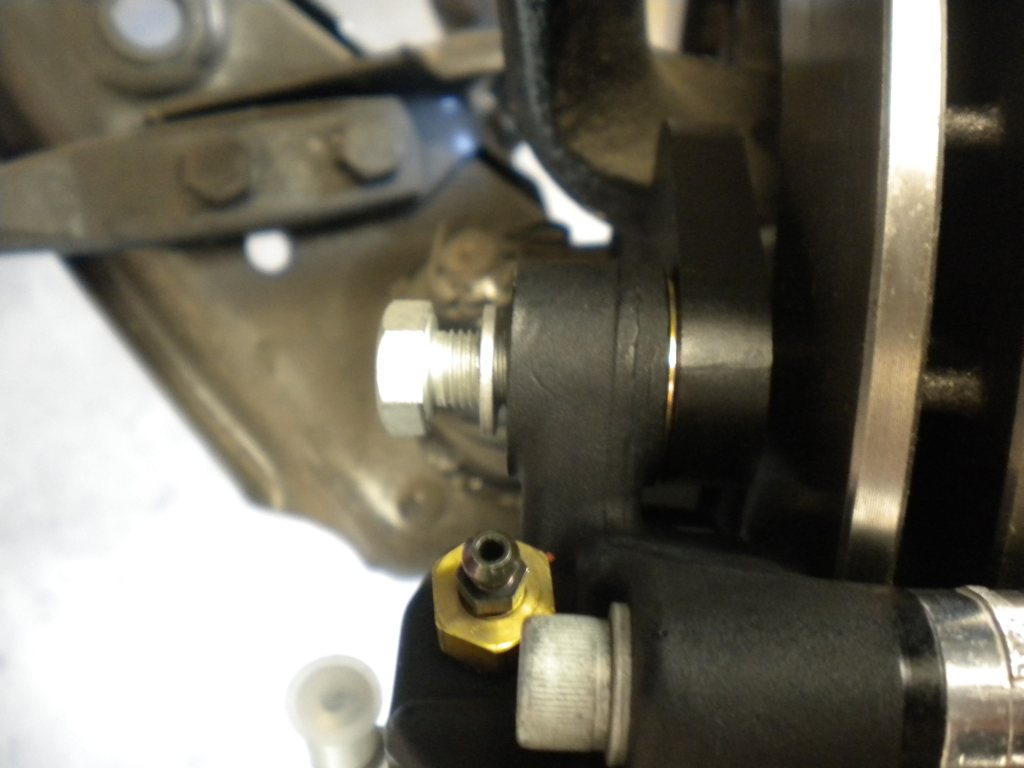
This is the suggested location of the shim. In the final assembly, I didn’t use any shims for a perfect fit.
We’re done!
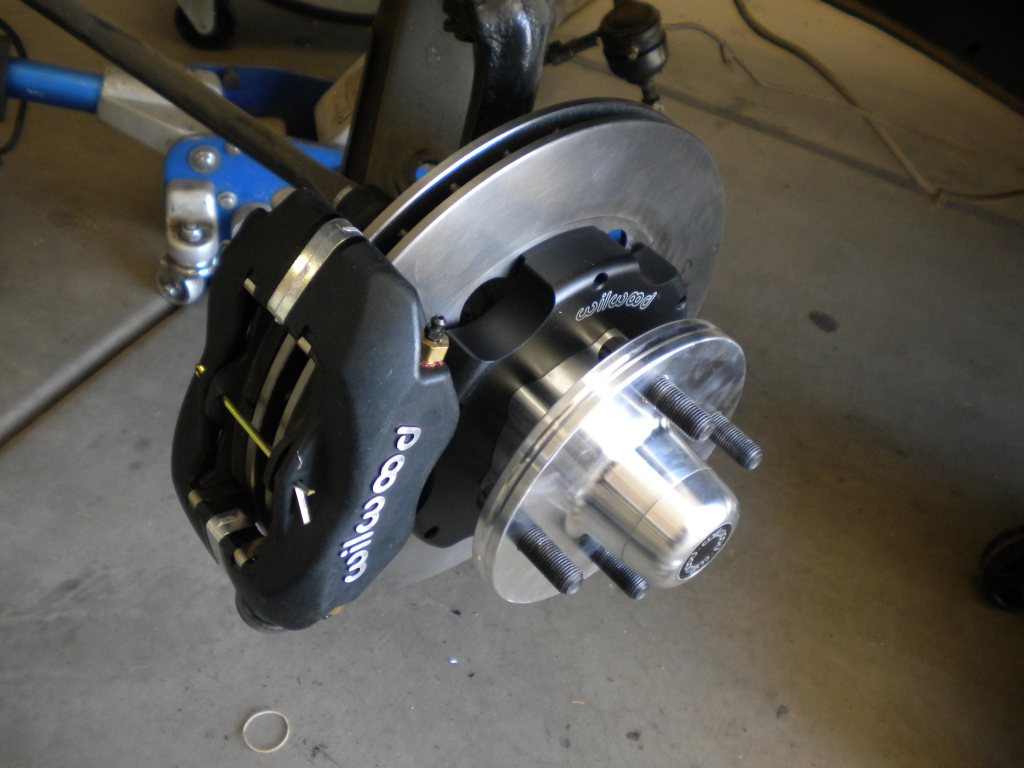
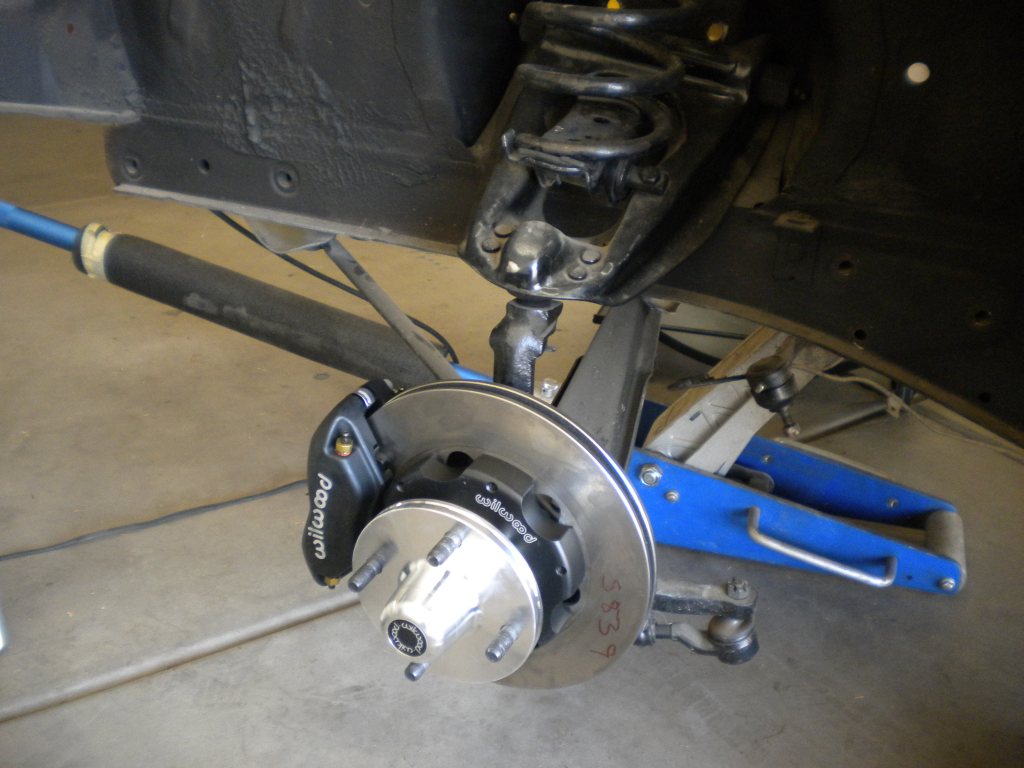
Here’s a couple shots of the finished product. Looks AWESOME, I think! And don’t forget, I dropped 5 lbs per side and have a more reliable, stronger braking system too. Before I drive, I’ll clean off the rotors, but since it’ll be a while, I’ll leave them as supplied to prevent any rust… (yea right, here in the Arizona desert?)
Final step: Wheel fit
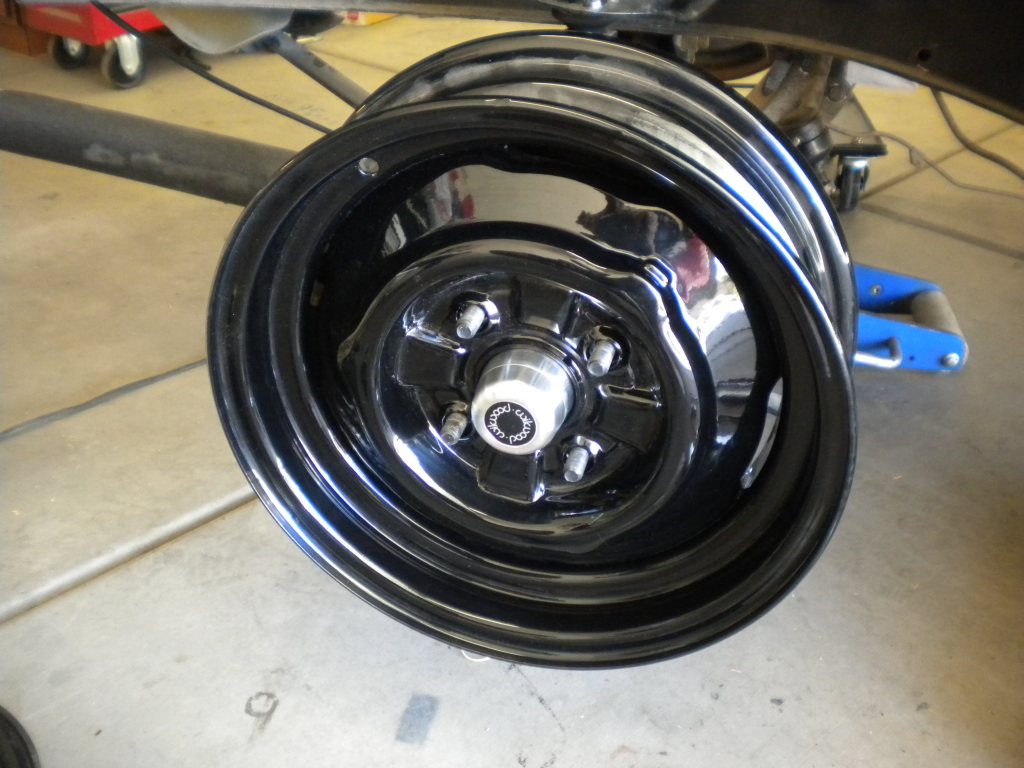
Wheel fit should be a question you ask before buying. I did, and Wilwood sent over a diagram of the kit with measurements of all the components. To be sure I would fit, I careful drew a template to scale on construction paper, then used that template to check with my wheels. It fit, but it was close! I expected to have to use the Wilwood supplied wheel spacers, but I don’t think I’ll need them after all.

If you need more help, look up this how-to video from Wilwood for a 4-lug Mustang.
Look for more updates soon or keep following this thread: 1963 Ford Falcon Wagon Build, especially when I let you know how well she handles!


Great upgrade and article!
I’ve got a 62 falcon wagon 6cyl drum/drum 13″. Will the same conversion work for me?
Hey Scott, thanks for your comment. This kit will work for your car, but you’ll need some 14″ wheels minimum. It’s a tight squeeze, even for 14’s so no way the original 13’s will work. Good luck! Let us know how your Falcon ends up. – pikesan
Thats great news!
Any lower control arm or tie rod mods since mine is a ’62? (I heard about going with 65 stang lowers)
Did you do the discs in the rear too? Its just a daily driver but i want it to really stop! – scott
Hi Scott,
Thanks for the note. If it’s a daily driver, like mine, especially if you’re keeping a mild six under the hood, I think good functioning drums are enough. That’s just my opinion, since the front brakes do most of the stopping anyway, right? “4 wheel disc” does have a nice ring to it though!! -pikesan
Great write-up. I’m having a tough time getting my 14″ wheels on the Wilwood brakes. Your wheels don’t look stock. Did you get those from a later model Ford that originally had disc or where?
Great to see. Been waiting for ages for such a easily bolted on kit. Can you supply the details of the specific kit. Cheers. Mitch from OZ.
Hi Andrew, sorry it took a while to reply… I think the wheels I’m using are from a Maverick. Not sure the year… I got them from a friend. The 14″ wheels I have are SUPER close, but clear just fine.
Hey Mitch, sorry I’m so late getting back. The kit is here: Falcon 4 lug brake kit I updated the link in the story too.
Which master cylinder did you use?
Hi Marc, I used a Geo Metro master cylinder. I was afraid of a spongy pedal so I shortened the attachment point on the brake pedal. It felt good for the little bit I drove it.