falconizer_62
| Location: | Garden Grove, CA, USA |
| Joined: | 01/10/2008 |
My Styles
Race only, H.A.M.B., Build-It, Drive-It, Custom Rodder, Old-School, Restorer, Builder
views: 79328
My Crew 8


My Blog
(6 posts)
I decided to tackle the part I have been dreading... [September 8, 2008] views: 2023
Yes, it's true, I have been dreading the front suspension of this project. Mostly, because I had no idea what I was doing or how it would function when done. Not doing it, ...
Is this all that 12 hours gets you? [August 12, 2008] views: 2077
We worked on the beast for 12 hours, and it almost looks exactly the same as it did before I started! (at lease to the neighbors!)
Certain tasks sure seem to go slowly. When I look back ...
The Youth Crew [July 29, 2008] views: 1975
One of my favorite things about building a car or taking on any project of that size is the community that is created around the construction of it. When you work on a project of this magnitude ...
After a long wait... [July 24, 2008] views: 1971
My buddy picked up the container from Oz last week. I have been waiting for quite a while to get the overdrive transmission. The transmission mount on the overdrive is 4 inches farther ...
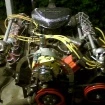
I finally finished the intake manifold! [July 10, 2008] views: 2144
After three months of work, the intake manifold is finally done! The reason I went through all that work, is that there are no four barrel intake manifold's available through the 3.9 L ...
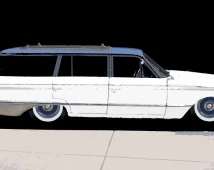
why not a four door? [January 30, 2008] views: 1938
When it comes to the Ford falcon station wagon, the "two door is better" mantra that is seemingly very prevalent these days (and yesterday) does not apply in my opinion. I ...